Learning ‘how to make cupcake toppers with Silhouette Cameo‘ assists the DIYers in adding positive vibes to any event or occasion. It’s an undebatable statement that Silhouette Design Studio plays a vital role while designing the patterns for the dessert toppers. But what matters the most is how to make them with a smart cutting machine and the designing software. This tutorial shows you the supplies needed and the method for creating personalized toppers.
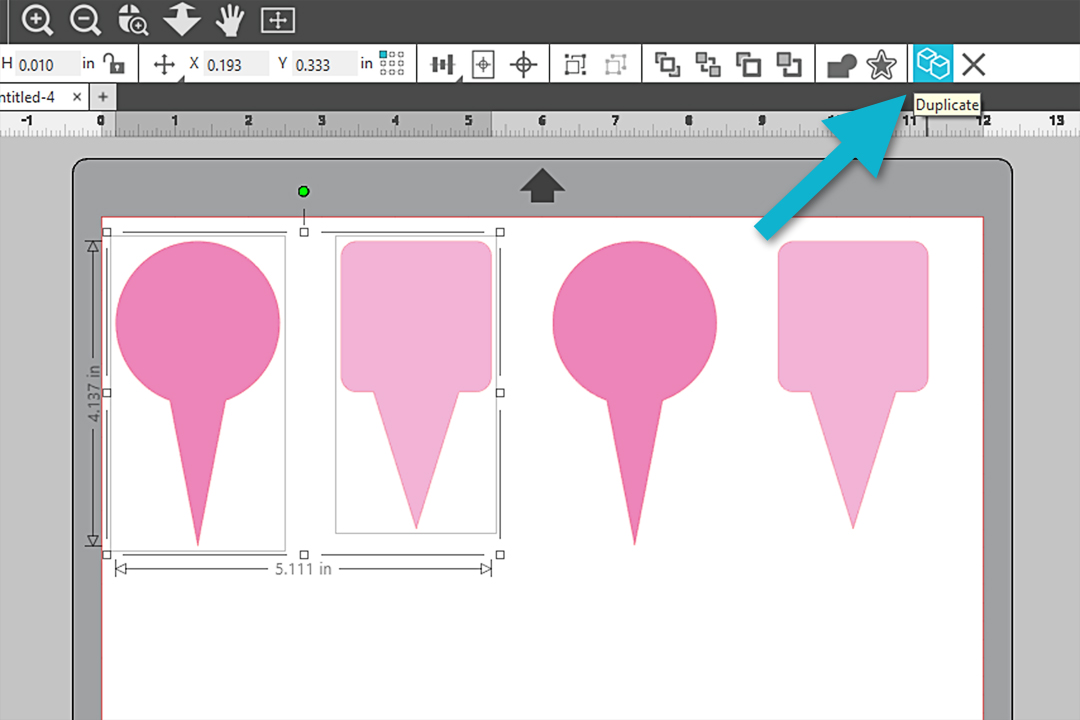
Step 1: Create Pick Designs in Design Studio
- First, visit the designing software and open Cupcake Topper Picks.
- Second, start making duplicates of each design; you can see them on the canvas.
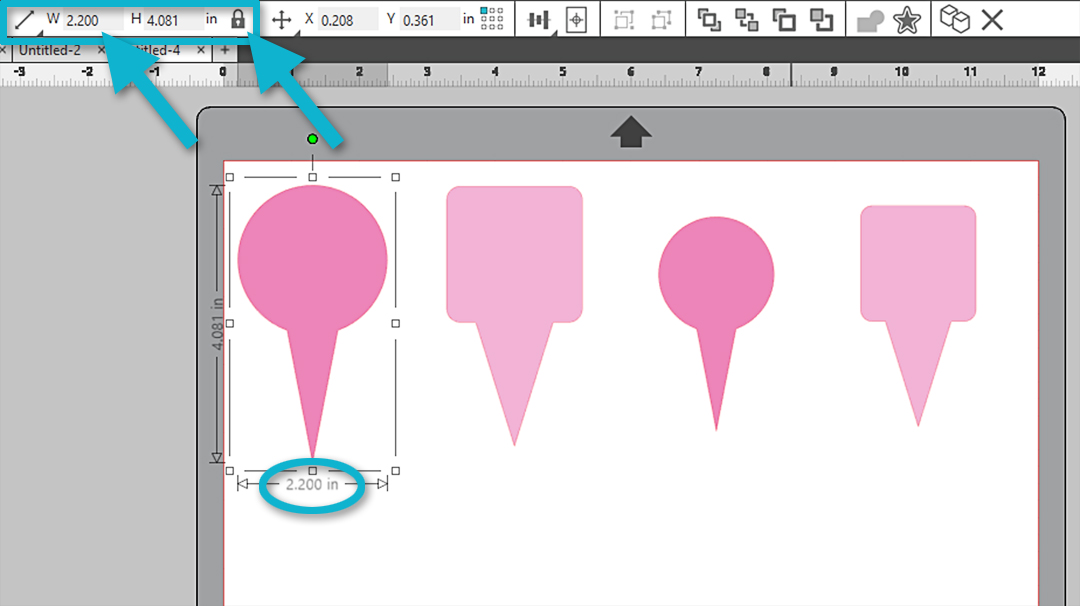
- Third, utilize the Scale input available on Quick Access Toolbar (QAT) for locking the aspect ratio & resizing the designs.
- Now, you must use the drawing tools and start drawing circle & square shapes for sticker backgrounds.
- Next, hold the Shift button to create a perfect circle and square without making any mistakes.
- Following this, use QAT again for locking the aspect ratio & resizing the shapes.
- After choosing the respective shapes (circle & square), fill them up by choosing a white color.
- Once you are done by completing step 1, save the file on your hard drive to proceed toward the next step.
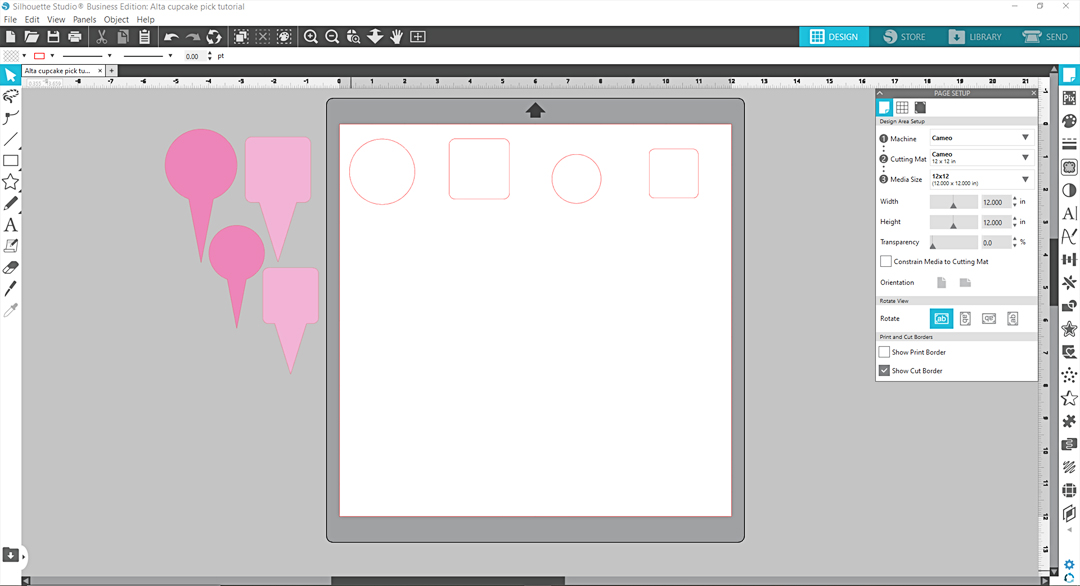
- After saving the file, open a new document on the software and paste the selected picks into the new document.
- At the Page Setup Panel, set the settings per the requirements, and you’ll get connected to the second step of the process.
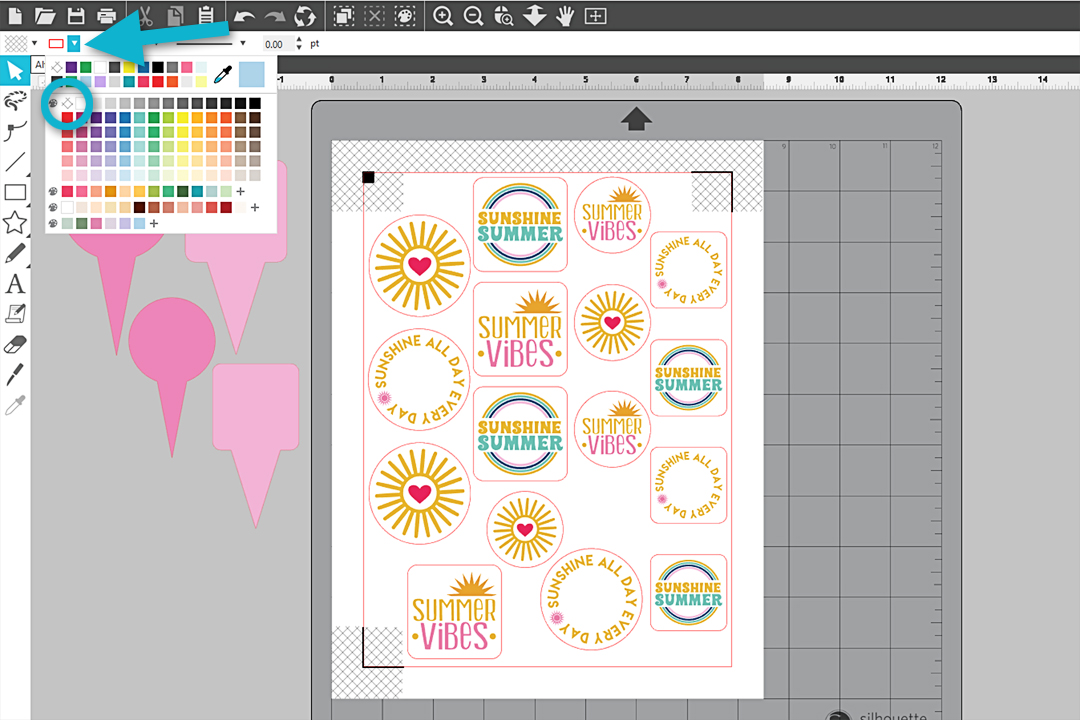
Step 2: Create Print & Cut Sticker Labels
- Followed by completing step number 1, return back to Silhouette Design Studio, and moving the colored picks to the side of the mat.
- At the Page Setup Panel, choose the settings visible on the right side of the screen.
- Align the square and circle to be available within the red border.
- In addition, open more than one design to resize and place over the sticker’s backgrounds.
- Next, depending upon the selection, you must resize the corner handle and duplicate (as necessary). It also varies on the size you’ve chosen earlier.
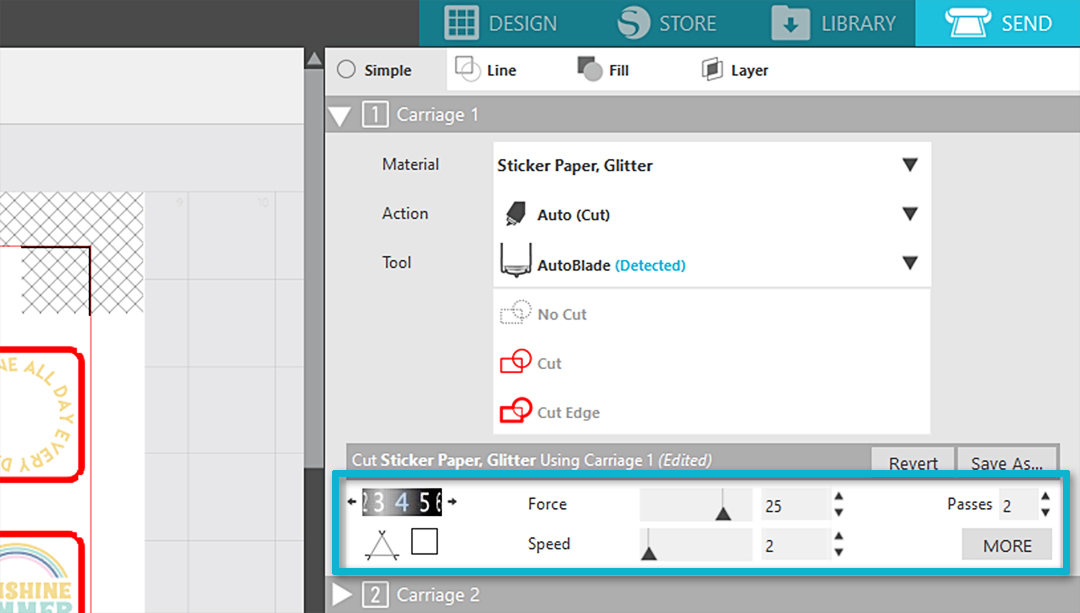
- Now, choose all the designs and press the Send box visible on the top right side of the canvas.
- Along with step number 6, choose Cut Edge, ensuring none of the inner pieces get cut down.
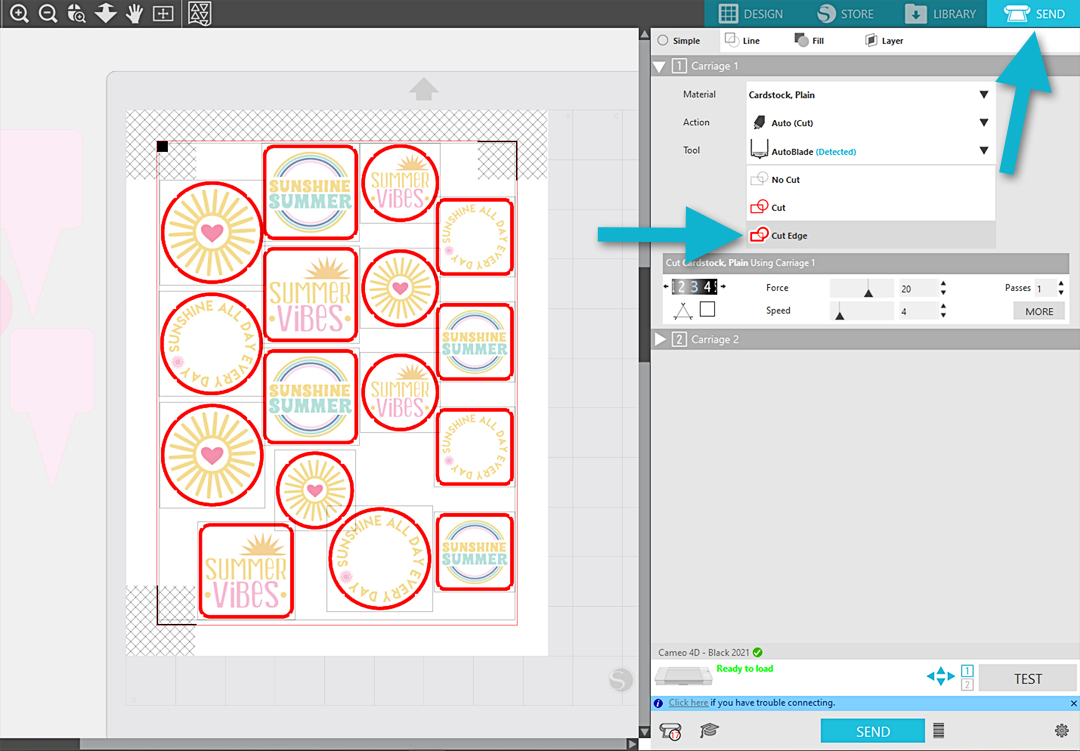
- Connect your Inkjet printer with Silhouette Design Studio and tap the Print option.
- When the machine is ready, choose the exact cutting settings for the sticker paper on which the design will be printed.
- When the printout is placed on the mat, load it to the machine and tick the Send box.
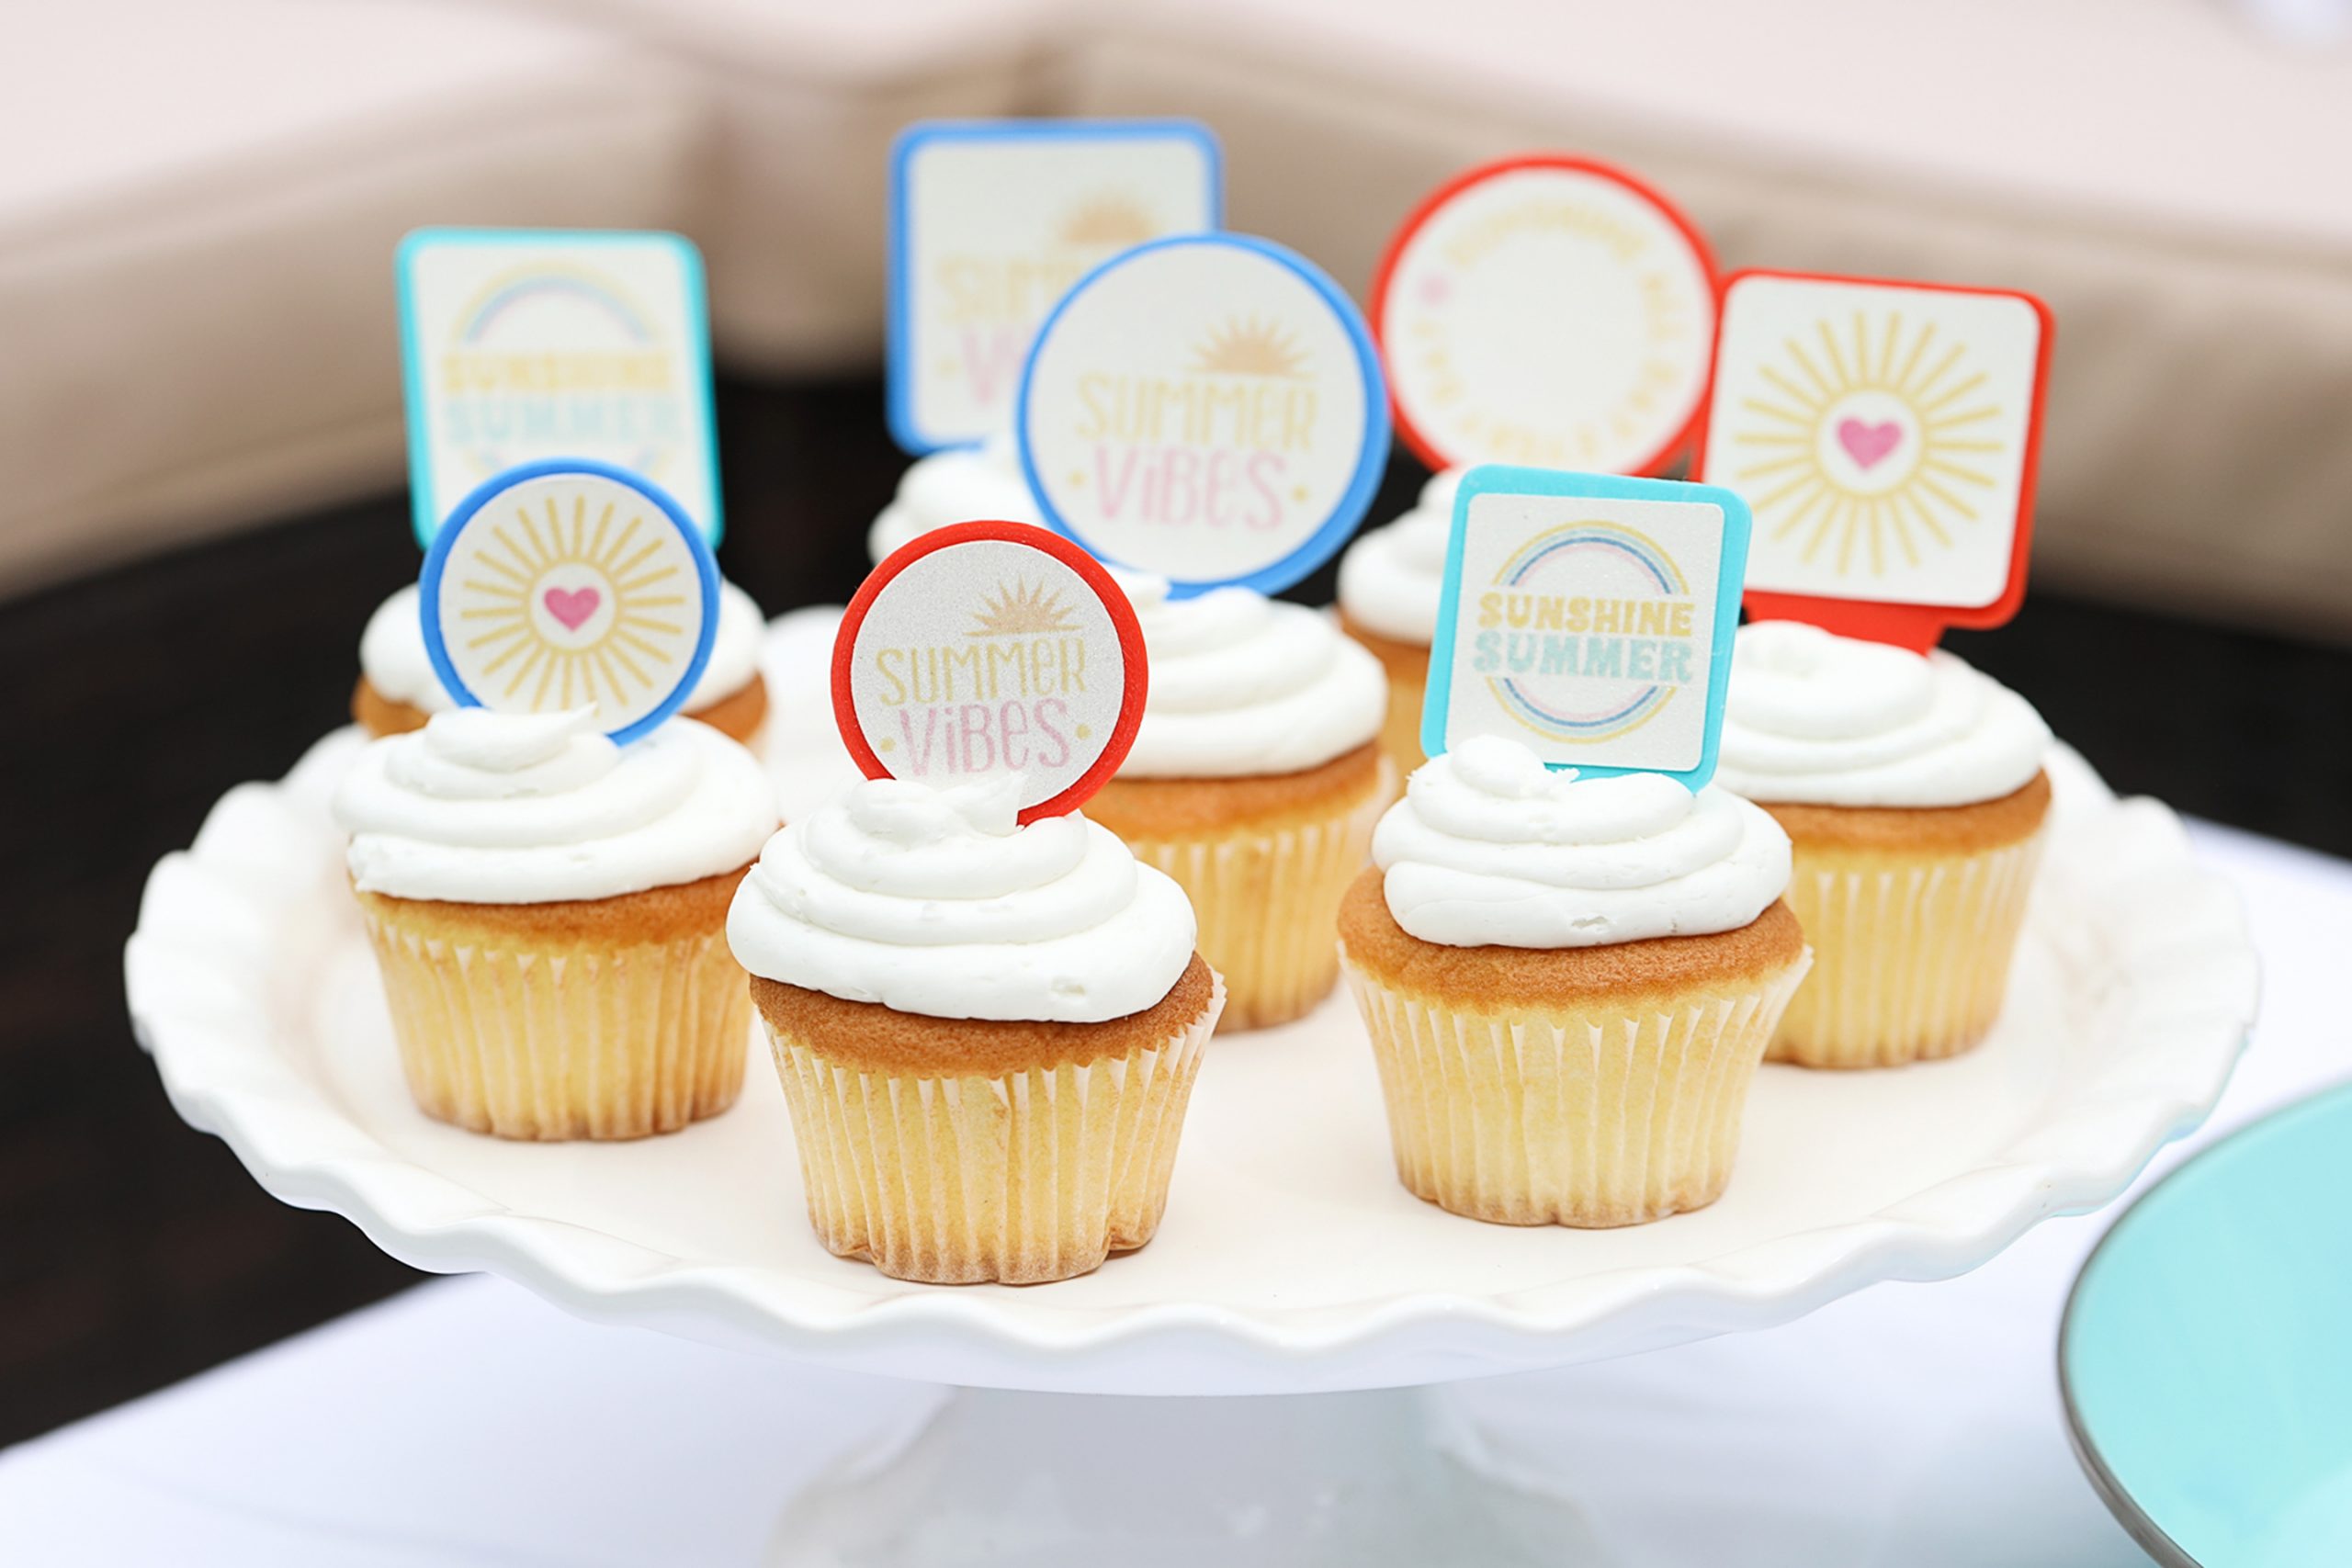
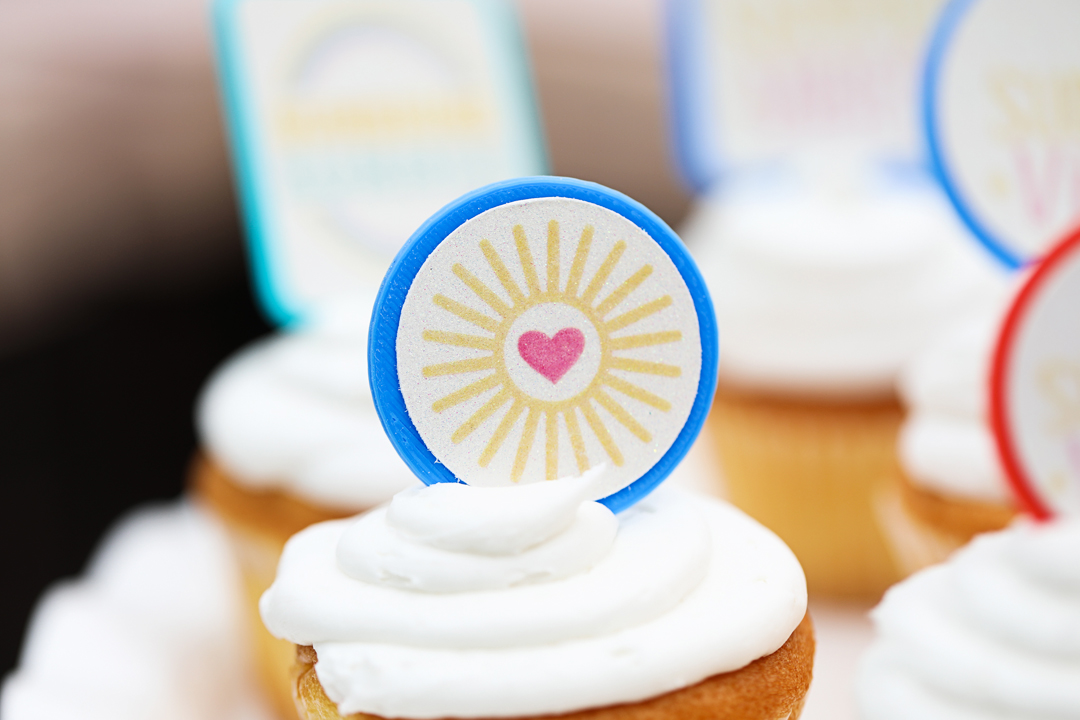
Step 3: Gather Cupcake Picks
- After getting the stickers’ printouts, stick them on the top side of each pick.
- Lastly, add them to the top of the cupcake and enjoy your moment.
Frequently Asked Questions (FAQs)
Question: What Supplies are Needed to Create Cupcake Toppers?
Answer: To design the toppers for any event, it’s basic for every user to have certain supplies. Those items will help them transform their imaginative idea into an I-Did-It concept. Have a look at the mandatory supplies in the pointers explained below:
- Design Studio software.
- Silhouette Cameo.
- Printable sticker paper & Inkjet printer.
- Respective Design ID.
Once you’ve all these items, you’ll be eligible enough to start the craft and finish it by choosing a certain amount of all these items.
Question: How Can I Trace Imported Images on Silhouette Studio?
Answer: Study the coming steps to learn about tracing the imported images on Silhouette Design Studio:
- Go to the software and press the Open option under the File dropbox.
- After that, press Trace and choose the Select Trace Area box.
- Draw the image you want to be traced and adjust the filters.
- Once the trace is selected, choose the method available under the Apply Trace Method option.
Question: What are the System Requirements for Silhouette Design Studio?
Answer: Currently, the software is a Desktop-only application for Windows & Mac. The minimum system requirements needed to support the software include:
- Operating System: Windows: 8.1-Windows 11 & Mac: OS 11 or upgraded.
- Broadband Connectivity: Strongly recommended for regular updates and access to Design Studio. Internet connectivity to activate a license key for upgrading.
- RAM: 4GB.
- Processor: 2 GHz or faster processor speed.
- Memory: 2 GB hard disk space.
- USB Port: USB 2.0 Port or higher.