
Creating fancy text in the Silhouette Studio app might seem intimidating, especially if you’re a beginner or don’t use the software very often. Many times, we don’t want straight text or simple projects, and that’s where the real struggle begins. If you are facing the same issue and feeling stuck, then you’re in the right place. Curved text can add a creative touch to your designs, but only when you know how to use the right tools. In this blog, I’ll help you understand the important Silhouette Studio features that make curving text easy. Let’s get ready to learn the process step by step and create better designs with confidence.
Step 1: Draw a Circle and Type Text in Silhouette Studio
To curve the text, first draw a circle to align it perfectly. In the left sidebar of the software, select a circle to draw in the workspace. Then, select the Text tool and type the text. You can choose any font of your choice. Use the Text Style panel to style your text. After that, double-click the text box so it turns bright green while the text itself remains black.
Step 2: Curve Your Text
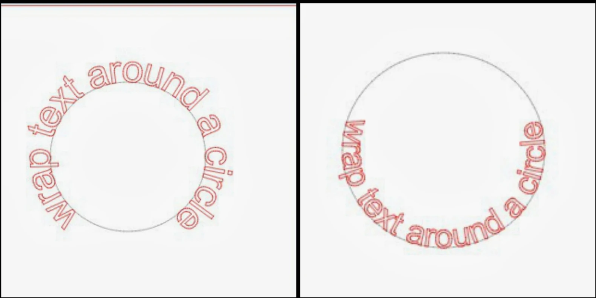
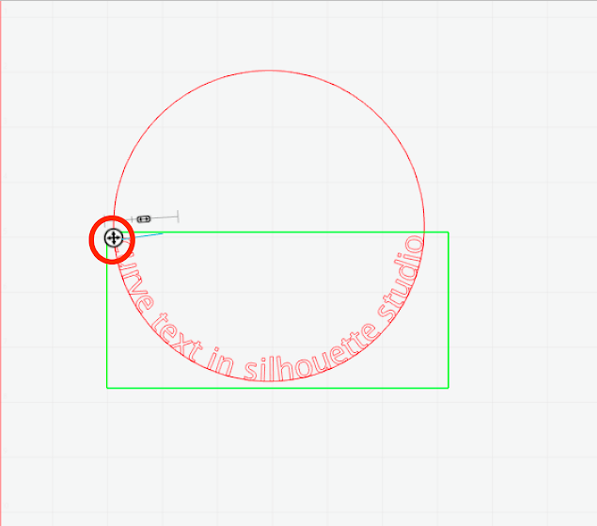
After selecting the text box, a small arrow will appear. This arrow can rotate or move the text as you like. So, grab that arrow and drag it to the circle you chose. Finally, the text will wrap around the circle, and you’re free to place it anywhere on it using the rotational arrow. You can also move the text up or down the circle by adjusting the lever bar.
Step 3: Use Convert to Path in Silhouette Studio
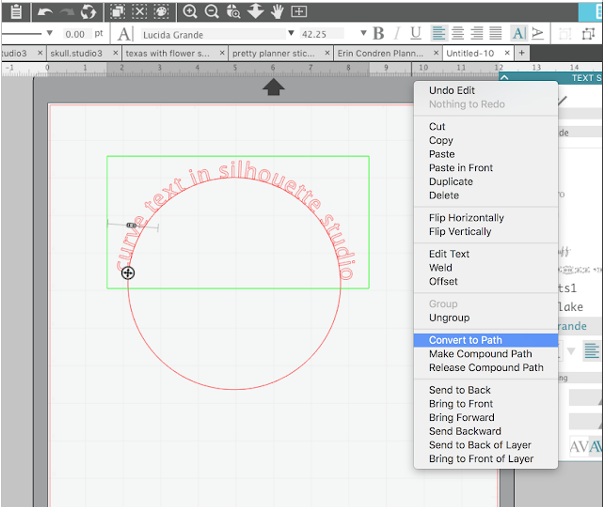
After finalizing the text on the circle, you need to lock the text in the curved form, even when you remove the circle. Select the text, right-click, and select Convert to Path. Your text is now frozen; you can remove the circle. It will convert the text into a curved shape.
Step 4: Curve the Text Under a Circle
If you want to wrap the text under a circle, type the text and select it using the text bounding handle. Your text is now inside the circle below. Now, use the lever bar to align the text below the circle. You can also adjust the spacing between letters using the right panel.
If you want to change the text font, then use the right sidebar. To lock the text, double-click on the text box, right-click, and select the Convert to Path option. Afterward, delete the circle, and the text will stay in place.
Common Mistakes and Fixes
You may face certain issues while curving text in Silhouette Studio, such as the text may not curve or may be set to inside the circle instead of outside. These problems are quite common and easy to resolve, so you can resume working on the canvas.
Problem 1: Text Is Not Curving Silhouette Studio
Your text may not curve when you don’t select the text. Only selected text can be curved. Hence, select the text box until it turns green. Ensure the text remains black, and then try to curve your design.
Problem 2: Text Snapping Inside the Circle Instead of Outside
It’s one of the common problems that occurs with Silhouette Studio. You may want the text to wrap outside, but it wraps inside the circle instead. This usually happens when the text is dragged too close to the circle. Therefore, make sure you do not drag the text too close to the circle, and use the rotational arrows to reposition it and adjust the lever to pull the text outside the shape.
Problem 3: Letter Spacing Looks Uneven After Cutting
After cutting, the text may look uneven and may not look professional. You can resolve this issue by adjusting the letter spacing before cutting from the Style Panel on the right side. Then adjust character spacing before cutting the design.
Problem 4: Text Moves When the Circle Is Deleted
You may notice that the text moves after deleting the circle. It happens when you don’t freeze the text with the Convert to Path option. It’s simple to resolve. Just select the curved text, right-click on it, and select Convert to Path. Now, delete the circle, and the text won’t move.
By taking these small fixes into consideration, you can curve text seamlessly. Now, you’re free to create your own custom designs with curved texts using your Silhouette Cameo 4.