Have you ever ordered a new craft machine, felt excited to use it, and then frozen the moment you opened the box because you weren’t sure where to begin? Many people go through this, and the Silhouette Cameo is no exception. I still remember a friend who bought her Cameo for making birthday banners. She unboxed it, looked at the cables, and said, “I hope this thing doesn’t judge me.”
If you feel the same, don’t worry. Setting up the ‘Silhouette Cameo‘ is much easier than it looks. Once you know what goes where, the whole process starts to feel simple and even fun. This guide walks you through every step so you can go from unboxing to cutting your first project without stress.
What You Need Before Starting
Before you start setting up your Silhouette Cameo, gather a few important things so your setup goes smoothly. Having everything ready saves time and helps you start cutting right away.
You will need your crafting machine, its power cord, USB cable, cutting mat, and the blade that comes with the box. Keep your computer nearby with a stable internet connection to download the ‘Silhouette Studio app‘. Make sure you also have some basic materials like vinyl or paper for your first test cuts. Once these things are ready, the setup procedure becomes simple and quick.
Step 1: Unbox the Silhouette Cameo

Firstly, open the box and take out everything inside. You will find the machine, power cable, USB cable, blade, mat, and the quick-start guide. Next, place each item on a clean and flat surface so nothing gets lost or damaged. Make sure every item is inside the box, and nothing is damaged before you continue.
Step 2: Connect the Cables and Power On
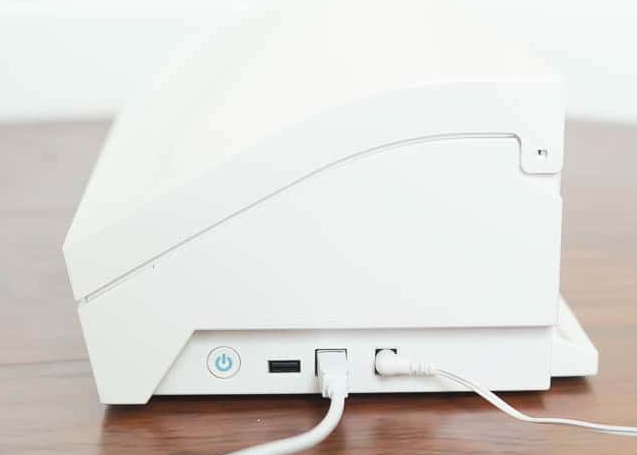
After unboxing, you have to place your ‘Silhouette machine‘ on a flat surface and get the cables ready. Now, plug the power cable into the machine and connect the other end to a wall outlet. If your model has a USB cable, then connect it to your computer. Once everything is in place, press the power button on the machine. The screen will light up, and the Cameo will start up, so you know it is ready for the next steps.
Step 3: Install Silhouette Studio Software
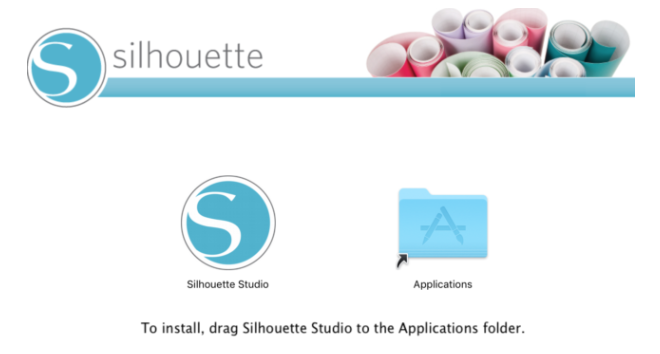
Now that your Cameo machine is ready, you will need the Silhouette Studio app to run your designs and send them to the machine. This program helps you create, edit, and control every DIY project you want to cut.
Go to the official Silhouette American website and download the latest Silhouette Studio version for your computer. Once the file downloads, open it and follow the steps on your screen to finish the installation process. After it installs, you must launch the software and then ‘Sign In‘ or create a new account. When the setup completes, your crafting machine will be ready to connect and start working on your first design.
Step 4: Setup the Blade and Cutting Mat
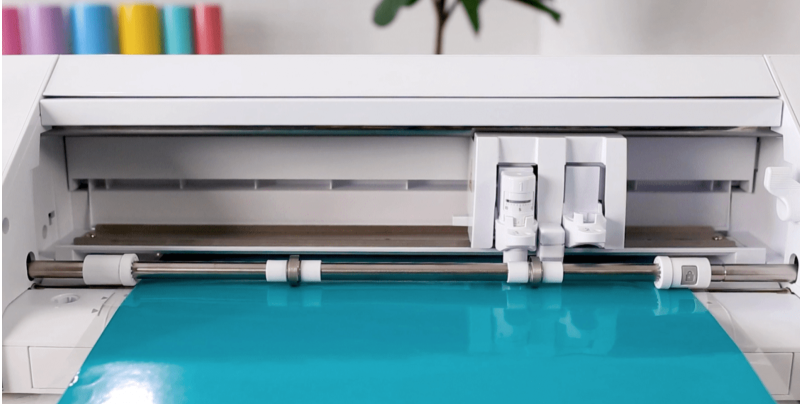
Now it is time to prepare your Silhouette Cameo machine for its first cut. You should start by inserting the blade into the tool holder and making sure it locks in place. If you are using an adjustable blade, then check the recommended setting for the material you plan to cut.
After that, take your cutting mat and place your material on it, smoothing out any air bubbles so it stays flat. Next, you have to slide the mat into your machine and press the Load button. Once the mat loads correctly, your machine is ready for test cuts and craft projects.
Step 5: Connect the Silhouette Cameo to Your Computer
Once everything is ready, connect the Cameo machine to your PC to start sending your project designs for cutting. You can use the USB cable that comes in the box for a direct connection. If your machine model supports wireless Bluetooth connectivity, you can pair it wirelessly through your computer’s Bluetooth settings. After it connects, the ‘Silhouette Studio app‘ will detect the machine and show it in the software. Now, your machine is connected and ready for your first cut.
Step 6: Do Your First Test Cut
Now that everything is set, it is time to try a test cut. This helps you check if the blade depth, then mat placement, and material setting are correct before you start a DIY project. Next, you will need to open the ‘Silhouette Studio Software‘ and pick the test cut option. After that, place your material on the cutting mat, then load it into your crafting machine, and start the cut. Once it finishes, lift the shape to see if it cuts cleanly. If it looks good, then you’re ready to begin your designs. If not, then make small adjustments to the blade or material settings and try again.